Building A Social Network in Wix | Part 5 | Posting User Statuses and Debugging Session
- Michael Strauch (MPS)

- Jul 14, 2020
- 23 min read
Are you guys ready for part 6 of building a social network in Wix, guys? I am stoked. Before we get into it, for those of you who don't know, I'm a coffee fanatic. Especially when you get to college, it hits you a little harder. For those of you that have obviously gone through college already, you probably have had some coffee in your life. If not, that's totally fine. But a little shameless plug, it's fall time here. We're almost at Halloween, so some pumpkin spice ice coffee necessary for today's video.
All right guys, part 6. What are we going to discuss? Well, before we discuss anything, let's jump right into subscribing here on Wix Training Academy, hit that subscribe button right down below, if you haven't already. I'm thrilled that you're here with me. I'm happy to have you here. Please join our community, it's an awesome place with some amazing, talented people to further your enrichment in our community.
Head over to wixtrainingacademy.com, click this ACADEMY button right here to register. And then you can also click Log-in. Obviously, if you're already a member, congratulations! Once you get on there, you get access to all of my webinars courses, training materials, a checklist, a community, masterminds, roadmaps, all this great exclusive Wix content. But you have to be a member to receive it, so head over there to check that out.
Guys, let's jump into today's video part 6 of building a social network in Wix. So if you remember where we left off last time I showed you how to build a registration button and build that lightbox or page, whatever one you decided. In that video, I told you that in today's video, we're going to build out the statuses feature as far as the feed and also the login feature.
I've had a lot of requests lately. So let me address one thing, I apologize for the lack of weekly content for this series. I am now back on track with that. I've got a hold of everything back here at college, it's been a hectic six weeks. I'm getting back into it, I've released a couple of videos as you've seen. But not once a week.
I'm hoping now to get back into my once a week schedule with that, I've also had some requests to start doing some certain things quicker than others in this series. And I'm weighing those options. So obviously if 10 people tell me that they want this done in the series, but a thousand people tell me, wait, no, can you do this first? And it's still in line with my structure a little bit. I'm going with a thousand people and put that in next.
So with that said, I'm going to show you in today's video, how to actually build out posting a status. So we're going to get, at least the initial framework built out, the database built out and then obviously we'll tune that whole posting status as we go. I will show you an image upload into the status next time whether that's next video or in part 8 because next video will likely be the login and the status feed. So I'm going to show you at least how to put in a text status for right now.
Building A Social Network in Wix

So let's hop into it. What I'm going to do is I'm going to our profile page here. This is where we left off with the profile page. As you can see, it's nothing sexy at all. It's actually very basic right now. Once it's actually designed out and user generated, it's going to look a lot more appealing, but what I'm going to do is I'm going to add just a little icon up here. I'm going to Add, and then let's find some Vector Art and actually let's use an icon.
What one do we want to use? Let's just say “message”, so we will use this little icon right here. And what this is going to be is when someone clicks this, it's going to prompt that actual post a status feature. So I'm going to change the color on this just a little bit. We'll go with this blue right here, again, we're following a Twitter like format. So this is not the direct message feature, this is a posting a status feature.
So now we've got the icon in place. Let's build out the database for building this whole status out. We cut back a second here, when someone, you have to start thinking in terms of this development. So when someone clicks on that button, something should pop up. Whether that brings them to a new page or a lightbox is up to you. Now, what you typically see on social networks is you'll see a lightbox pop up. And that's where someone has the ability to actually go ahead and write their status.
I'm going to show you an example of this. So I'm going to go to Twitter, like we are kind of mirroring off a Twitter, as I've mentioned to you several times. And if I go and click this right here and I click tweet, you see what happens? A lightbox appears. Now, obviously Twitter's got a few more enhanced features in their actual tweeting ability, such as adding GIFs, adding polls, adding a location, adding pictures.
I will get to the pictures and depending on how deep we get into the series, I may even show you some features like adding a GIF or adding polls or location. That kind of thing, I may go that deep. It depends how deep you guys want me to go into the series and how much you're enjoying it and how frequently you're watching it and how engaged you are and all that good stuff. So this is what I'm kind of looking to build out here right now.
Now, if we think in terms of the development of this, we know that for this text status, in these different features right here in the tweet, a database is required. The information has to be stored somewhere. When someone tweets something, it has to be stored somewhere in order for that to happen, we have to have a database for it to be stored.
Once it's in there, we also want people to be able to view the status, right? So we need the database to have permission for people to view that content, but also user generates that content. So I'll show you how that works right now.
Adding Lightbox
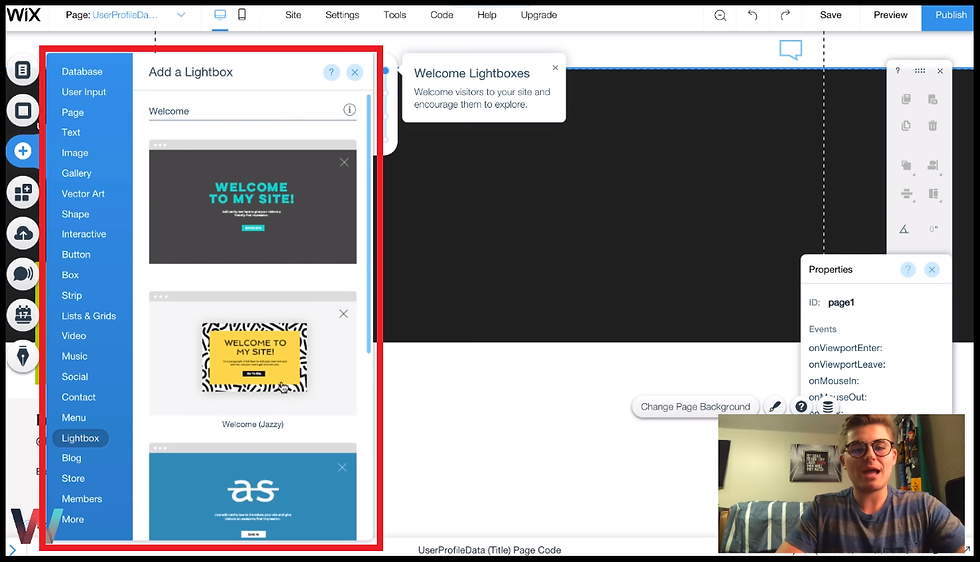
So if we go back to our site here, what I'm going to do is I'm going to go to Add right here. And I'm going down to Lightbox and we're going ahead and we're just going to pick one little random one to pull on here right now. We'll use this one right here and I'm going to delete everything in here at the moment because we're going to build our own.
So I'm going to change the overlay background. I'm going to drop the opacity to nothing. However, I'm going to add a box in here and I'm going with the rounded design, kind of like Twitter had there. We could use this as a reference. You can see it's got rounded corners. I'm going to make it a little bigger. And then what I'm going to do is I decided that I might make that overlay a little bit visible, do that. And then I'm going to change the color of this box to this grayish whitish color.
And it still looks like we've got kind of pointy corners, so let's changed that right now. We'll go back up here to our rounded box. That was an error on my part. I was just supposed to change the color and not change the actual design of the box. And we'll come in here and we'll add a similar color. There we go. We'll go with just the white. These aren't bad. Let's go with that thought right there. We'll go to that right there. So now we've got this box here, guys.
I'm going to drag it out to the edge of our little lightbox parameters, which you can change. And then now I'm going to add another portion of the box. I'll show you guys this. Just like Twitter, you'll see exactly what I'm doing. I'm coming up here and I'm adding that. Not going to say compose a tweet because this is not Twitter. We're not building Twitter. We'll just say, write a status. We'll keep it very simple right now.
We might come in and change some of the verbiage on this later, but at the moment, we're just going to keep it very simple and it will say, write a status. So I'm going to come in here. I'm going to grab some text. We'll come in here, I'm going to change this text because I do not like that font personally. Some of you may, and I'm going to choose one of the fonts that I use and we'll go with “Compose A Status” and then what we'll do is we'll make sure it's centered here and then I'm going to bold it and I'm going to make sure it's black text. So we've got “Compose A Status”. Perfect!
So now we have the basic framework of this lightbox. That's going to pop up when someone presses that button. The other thing you have to do, as soon as you get this lightbox up is go to Set Triggers, and then make sure you click Automatically display on lightbox on pages to No, this means that it's not automatically going to pop up. As soon as it hits the user's profile page, in order for it to pop up, some button must be clicked. In this case, they're going to click that little icon up in the right in order to pull this little post to status lightbox up.
Coffee break, you got to love pumpkin spice. All right, thumbs up for pumpkin spice.
Building the Database
Now that we've got the initial little framework out, let's build the database of this. So you get the idea of that framework. So what we're going to do is we're going up to Code here and it's already got the Developer Tools on. However, if your developer tools are not on, it'll say turn on developer tools here just to show you where that's at and how that works. What we're going to do is we're going to click this little arrow and it's going to pull out our Site Structure here. And then we are going to have our 2 databases.
If you remember correctly, in one of the second video we did, we created a database ahead of time because we planned out our website for user statuses. However, we never actually built out the database. We just set it up, so that way we had it and knew it was over there as a placeholder because we needed to have that database as one of the main ones in this website.
Setting Permissions

But let's double check something here. Let's check what our permissions are and see if we got that right the first time. So we're going click Edit Permissions and let's review and see if we got them right in that first one, so “Who can read content from this collection?” so this is a very good point, guys.
If your site requires a user to be a member to view statuses and post content, this “Who can read content from this collection?” needs to be “Site member”. And that's how I'm going to set this website up. So that means only site members can read the content and only site members can post the content. Anyone else cannot view the content from the outside, in this particular social network that I'm building.
If you do want anyone to be able to view statuses or content on your website, which this comes down to personal preference and whatever type of social network you're building out, you would change that to “Anyone”. So that way any site visitor could view the content that does not mean any site visitor could post the content. It means any site visitor could view the content.
Now, if we come down “Who can create content for this collection?” this is where you're going to want to have site member on or maybe you're not going to want to have site member. So I put “Site member” for this. Then “Who can update the content?” the “Site member author”. So the person that wrote that tweet is the person that could update or edit that tweet and who can delete content from this collection. The person that wrote that tweet can edit, delete, or update that tweet. And then we will click Save.
Status Field
Once we update our permissions and get those set correctly for our social network, let's build out this first section of the database. Now I'm going to blow your mind with this one. We're only doing the text portion of the status update right now. So with that said, we only need to upload a status field right now. So we're going to name this field “Status” and then the field type is going to be Text. We're going to click Add.
Now you may be sitting here like, is that it is that really all we're doing? And the answer is yes, that's all we need to do right now. All we have to do is create that status field and this entire database is going to be full of user statuses. Text status is only right now, when we get ready to add the image section of it, we will go ahead and actually add an image section as well, that will go with the text status, but we're not quite there yet because there's a little bit of in between coding that has to happen there. And I want to save that for a topic in of itself.
So we're going to do the text status right now. So now that we have that built out, what we can do is we can go back to our lightbox here and it's still set to as Welcome(logo), and I'm going to go back and we need to now get a text input field.
So this has to be a User Input field. So what we'll do is we'll go to Add, and then we'll see Database and User Input, we want the user input. Now this is a text status guys. So you're going to want a text box. We will select this one right here. So we add our text box now. And what we're going to do is we're going to drag it out. So obviously we want a text box because they're posting a status.
And if we're following a Twitter like format, they're not posting a crazy long status, which Twitter is limited to 144 characters, I believe on. They also extended that to 280 characters for selected accounts. We can actually set a character limit on this, which if you're running a Twitter style website, I do recommend doing because you're going to want to make sure that you maintain some sort of uniformity to your social network.
You don't want it to be a complete free for all. When you build a social network, you want to build into a certain niche. I don't recommend going to build another Twitter or another Facebook or another Instagram. Those are three top dogs in the market.
Now, what I would recommend is if you have an idea like that, but you have a unique spin to it or a unique niche or industry, then go for it. But if you try to go straight up against the top dogs, you're likely going to just get beat down, i's the truth behind it. So you have to make sure you keep a unique edge. And part of that is maintaining uniformity in a good, solid based to your social network. So I definitely recommend you do that.
Profile Picture

So we get our text box here, and then next to our text box, what I want to do is I want to add the user's profile picture. So let's go back to image here and we'll just go to my image uploads. Let's see if we could find the good old me. Look at that handsome fellow right there! I definitely did not want to do that. Reset crop. Now let's change this to this circle. I'm still working, Wix is still working on changing back this whole new image process.
I'll be honest with you guys, obviously I love Wix and I support Wix. I hate this new image cropping, honestly. Reset to original proportions, sure. Let's see, don't keep proportion. There we go. And you know, it's going to look like junk for right now. It's okay, we'll remold it later. So yes, so you see what happens to the picture now on Wix, but anyway, it gets the point across for the point of this video. We want the profile picture to be right there. So we're going to connect this right here to Create a Dataset, Choose a collection, UserProfileData.
So essentially what I'm doing guys is I want to make sure that the profile image right here is the one connected to the current logged in users account. So I'm going to add the Dataset. And then what I'm going to do is I'm going to double click this Dataset. I'm going to choose “Read-only” on it and add a filter. And I'm going to choose is logged in user. So the field owner is “Logged-in user”. I'm going to add that filter. And what I'm going to do here is I'm going to make sure that that is linked to the profile picture.
So now by doing that, did you guys catch what I did there? So that was a very important step. This is actually going to save you a lot of time in a lot of different things. I didn't mean to just breeze over that. So what I did is I want this profile picture right here to be the profile picture of the current logged in user tweeting. In order for me to get that, what I had to do was I had to add a dataset. Why did I have to add a data set? It’s because I was connecting to the profile picture. That's currently residing in the user profile database.
Now there's no actual user profile in that database right now. So there is no picture to pull from because there's no data in there at the moment. But what would happen is, it would pull the profile picture that's connected to the current logged in user. Now, how did I make it to the current logged in user? I clicked on the Dataset, it's going to be a “Read-only” because the person's not uploading any information. As far as their picture goes, it's already uploaded.
I went down to Filter, I added a filter. I would choose owner, the condition “is”, the owner is the logged in user. So that's how it makes sure that the profile picture connects and pulls from the current logged in user's profile picture. That's how that works. That's a very giant step that can be applied to all of the different elements in your social network, especially when working with profile pages and statuses and everything like that, that does not just apply to this picture. I'm drilling that in because that's a very important aspect to this, and you've got to know how to do that. So hopefully you caught that if you did drop a thumbs up.
We'll take another sip of coffee. A new series, coffee and code brought to you by Michael Strauch owner at Wix Training Academy. Guys, this coffee is very good. Anyway, sorry for the break.
So now we have our profile picture, current logged in user profile picture. Again, when we go to preview, there's likely not going to be a picture there because there's no profile pictures in the database. So there's nothing to pull from.
We have our text box here. Now let's edit the settings on our text box. So if we go in here, we can choose settings and you can actually see here something Limit Length, pretty cool right? So I'll show you that in a second.
So placeholder text, “Add your status here...” Obviously guys, if you're building a legit social network, get creative with what you put in these, make sure people know that this is where they type their status, but get more creative. “Add your status here…” is kind of boring. I'm sorry, I couldn't think of anything funky. Add your status here. Well, “Feeling funky, feeling pumpkin?” We're creating words now guys, “Feeling Fresh?”, get creative with it. Add some creative stuff there.
If you're actually building out a legit social network here you, you want to draw people's attention. That's the whole goal, you should have fun. When you're building out a website, especially a social network, you're helping people connect and you want that to be a fun experience. So you as a developer have to have fun in building that.
So now that we have that, we're going to make this a “Required” field. And the only reason we're making it required, this does not mean that the user has to upload something as they click on this. This simply means that in order for that submit button to be pressed, there's got to be something in this text box. Otherwise it's just going to submit a blink, blink something. And we don't want blank statuses all over our social network. So we're going to make that required.
Setting Limit Length
The next thing we're going to do is we're going to Limit length. So just like Twitter, we could choose how many number of characters each individual status has. Now, I sometimes don't like just the 144 character limit. It's 140 or 144 on Twitter. So what I'm going to do is, I'm going with 280. So I'm going to pretend like we have one of those select Twitter accounts and we have a match of 280 characters. So what this does is it limits this in particular user to writing only 280 characters in that text box. So the max that they can tweet is 280 characters. I'm going to X that out.
Submit Button

The last and final thing we need to add to this posting a status is the submit button. They have to be able to post it. So we're going to come here to Add, we're going to go to Button and let's find what one we want to add. This is kind of that round design that we've got going on. So we'll come down here. We'll put that here and then we'll change the text to say “Post Status”. And then let's change that color up a little bit, something a little bit funky as I like to say.
Kind of like that one for right now, it's got that lighter color scheme. It's like a lighter purple on Hover. It could be Disabled, it could be that. But on regular, we'll have this color right here and that text again. I don't like that font. Let's come up here and let's go with some “Montserrat Regular” and now we've got that post status button.
Now what has to happen is we have to add another dataset. Why? Because let's see if you can figure this out, pause the video right now, take 3 seconds to think about why we need to add another dataset and I'm going to take a sip of coffee.
So why do we have to add another dataset? It’s because this information has to be submitted to that database. So we have to make sure there's a database or a dataset connecting the actual button in what's in that text box to the database. Again, how I referenced the dataset and all my past Wix code videos is the dataset is kind of like the glue. It's what glues together the post to the user generated content and the database.
So what we do is we'll come up here and to Add, and then we will go to Database and we're going to add a “Dataset”. We're going to take this dataset, we're going to put it wherever we want. These datasets are invisible, which means that nobody can see these on the public version of the website. So even if you have it smack dab in the middle of the page, no one can see that. And we're going to go ahead and double click on that.
From there, we're going to Connect a collection, so we're going to connect to “UserStatuses” because it's submitted into that text box. We're going to choose the mode to “Write-only” because they're writing a status. Then we click off that. And now what we're going to do is we're going to change this text box. We're going to have this connect to “UserStatuses”, and the value connects to “Status(text)”. Now that that's connected, we need the button to act as a submission. So we're going to click the button.
We're going to connect to data. It's going to connect to the “UserStatuses Dataset” and the label is going to link to connect, the label is not connected. And then when successful, let's just for the sake of this video say that it will go back to the homepage. So we'll just have it go back to the homepage. You can add a success message as well or a failure message, just so you know. But what's going to happen now is the user's going to post something it's going to submit. And then it's going to take us back to the homepage.
Status Upload Page
Just so we can see the mechanism work a little bit, I've decided I'm going to extend this video a little bit further and show you briefly a status upload page. So where the status will actually be displayed, this is going to be a very basic version. We're going to have a whole entire, probably two, three part series on this alone.
What I'm going to do is I'm going to go back up here, so this is our status update lightbox. So we're going to save that there. And now I'm going back to Manage pages. I'm going to go to Site menu, and I'm just going to put here a “STATUSES PAGE”. And then I'm just going to keep this nice and simple. I'm not going to use for the purpose of this in particular. I just want to show you that it actually posts the status.
This is going to show you how the status will be posted. So we'll have that there and then we will definitely 100% change the color of this box. Let's just change it to that similar color that we had there. We'll kind of change it to baby bluish color here. And then what will happen is one will change that. And then I'll just show you for the sake here, how this will work. We'll add our text here. We'll change the font on it.
This is a very quick preview, but I want to show you because it will be cool. And I think you guys will be impressed and you'll like it. And I'm all for that. So our status is going to be posted here. This text is going to be our status.

Now, how do we actually make it show that the status is posted there? Again, I'm going to have a full tutorial on this, but I'll show you quickly. So we have our database, so just like the dataset acted as the glue, when connecting the text box to the database, we're now going to use another dataset to connect the database to our statuses page. So we're going to go back into Add. We're going to database. We're going to dataset. We're going to click on dataset. This time it's going to be “Read-only”.
Again, I'm going to show you a whole design of this page with the ability to edit all that good stuff after the fact. But for this purpose, I'm just going to show you how this will work. We're going to choose a collection. It's going to be pulling from user statuses. It's going to be “Read-only”. And we now want this text right here to connect to status in the status update.
So now what's going to happen is, as soon as we post a status that status is going to be uploaded here on this page. Now, essentially, when we actually build out the page, we're going to use repeaters to actually build out individual statuses. I'm not showing you the full build out of this page yet, but I want to show you that it'll work.
So I'm going to save that. And I'm going to go back to the homepage, we’re going back to that light box. And instead of having the submit button send us back to the homepage, I'm going to have the submit button link us to the statuses page, click that. So now I'm going to go back.
Then what I'm going to do is just for the purpose of this, you can see up at the top, it's in the header. I'm going to press Publish, and then we're going to go ahead and give this a nice little test. View site. Let's see our work in action ladies and gentlemen, coffee for this one. We click our little status icon here.
Let's make sure it's still linked. No, it's not. So we want it to link to a lightbox and we want it to link to the status update. My bad, let's publish that let's view site. Let's X out of this one.
Yes, so we've got our little, huh? I did that on the testing page, my apologies. So let's go back to the homepage and do it on the homepage. So let's make sure that's linked to the status update box. Good! We should be good to go now.
Just in case it has something that we're doing to do in the header. Let's just do this and we'll give this another go. There we go. So when we click this, aha! We've got composes status right here. Add your status here. “I am having an absolute blast recording this next part of “Building a Social Network in Wix | The Non-Coding Founder’s Guide” Please check out my newest video and do not forget to subscribe here on YouTube. Also, by the way, guys, what I'm trying to do is I'm trying to hit the character limit to show you how that will work.
Also head over to the Wix Training Academy website and register for an….” Okay, did you see that? And register for an account. It won't let me type account. You hit the character limit so you can see how that works. It stopped me right there so head over to the Wix Academy website and register. Now, if I press “POST STATUS”, well maybe it's not going to post. Let's take a peek at this.
Let's go debugging phase now. Status, you want this? This is connected to user status. Yep. Status text. This is a Write-only user statuses. And now we want this connected to the data we want it to link to. We wanted to submit and link to the statuses page link to the statuses page. Is it Read-only so we shouldn't have any problem there. Let's just give it another other peak. Let me just copy that. Let's take a peak here. You're just giving me a pain, aren't you now? Let's try to figure this out. Let's try to debunk here is at one. We want the information to submit. Let's just see.
If we change the page, how that'll work? Submit. Why aren't you posting? Aha! So you just experienced first-hand, I believe why this thing was not posting. So thank you for being a part of my also debunking session in this video. So you just got to witness me working through the debunking session.
Why is this not posting? Well, let's take a step back. What are our database permissions? You have to be a site member that's logged in to write a status, right? That's database permission. So for the purpose of this, since I don't have the login feature bill, yet, I'm going to go back to the database in just as a process of elimination. See if that's what the issue was. So if I go to user status this here, I edit permissions. If I changed this to “Anyone” on each one, I believe we will have our problem solved.

Let's see, did anyone catch that? Because I had everything set to “Site member” and I wasn't actually logged in to the live site. I didn't have an account and I wasn't logged in on the live site. It wouldn't let me post anything. Now I haven't shown you guys how to actually add an error message that tells them that's the reason why, which is why I was tripping up on my own website. But I believe that's what our reasoning was that the database permissions literally would not let us post it because we weren't a logged in member.
So now if we click save and we click “Publish”, I believe we're going to get a different type of reaction here. I'm going back here. View site, let's let's take a peak. I believe that's what happened.
Aha! Yes! Now let's have a redirect to the user status page to show you how that works. So I tried to change this, the status location button, because I thought it was a problem with what, where it was going, but it's not. There's a problem with database permissions. Statuses page, let's go back. Let's publish this again. Boo-Yah! It's so satisfying guys! Once you get to that point where you're actually writing some code, this isn't coding in particular, but you're making a lot of connections between databases and you could debunk the issue you're having. It's a very satisfying feeling.
So let's try this again. And right here, I'm just going to put that same thing. And now there it is! Our status was posted. We posted the status, it went straight to that statuses page. Now this is just a complete mock up version to show you how that works, but you can see that that exact status was posted right here on this page.
Conclusion
That is how you create a status uploading system for your social network. This is very helpful tutorial, please utilize this. This goes for any text content, I will show you how to do the image content as well. It's the same exact format it's set up except you also have an image upload as well.
And you have an image upload spot in your database. I will show you that in a separate video probably our next video since we're on the topic of statuses, but this is how you do it guys. We did it! We did it! We debunked it together! We got it together. This is exciting stuff!
If this video helped you out, please throw me a thumbs up. If not for me at least throw a thumbs up for a shameless plug here, Starbucks in their pumpkin ice coffee. Subscribe here on computer, on Wix Training Academy if you haven't already. Comment if you have any questions or you're like, wow! That was helpful. Comment that down below and also head over to wixtrainingacademy.com link in the description below, go click that ACADEMY button following all of my building a social network series videos.
I upload a checklist into the Academy that you can follow step by step to make sure you hit all these proper necessities on the list. And you make sure you don't skip any steps. So I will upload a full checklist on building out that status function. So make sure you go check that out, sign up, just click the Academy register and you'll see the register pop up and go ahead and get in there. Everything's completely free in there maximize and utilize that content as much as you want.
Thank you guys for watching, this has been a fun video. I will catch you on our next building a social network in Wix series, the non-coding founder guide on our next week's tutorial. Thank you guys, very much! Touch on the next one!


شيخ روحاني
شيخ روحاني
الشيخ الروحاني
الشيخ الروحاني
شيخ روحاني سعودي
رقم شيخ روحاني
شيخ روحاني مضمون
Berlinintim
جلب الحبيب
I needed expert guidance for a sustainable design project and Native Assignment Help delivered just that. Their architecture assignment help included original ideas, technical accuracy, and professional formatting. This is more than just an assignment help service—it’s a valuable academic partnership. My grades improved, and I finally have peace of mind when deadlines approach.
These family portraits mean everything to us. They Hawaii Portraits show the laughter, chaos, and closeness that make our home special. Truly priceless moments captured forever.
EPS Machine EPS Cutting…
EPS Machine Eps Raw…
EPS Machine EPS Recycling…
EPS Machine EPS Mould;
EPS Machine EPS Block…
EPP Machine EPP Shape…
EPTU Machine ETPU Moulding…
EPS Machine Aging Silo…
EPTU Machine ETPU Moulding…
EPS Machine EPS and…
EPS Machine EPS and…
AEON MINING AEON MINING
AEON MINING AEON MINING
KSD Miner KSD Miner
KSD Miner KSD Miner
BCH Miner BCH Miner
BCH Miner BCH Miner
Projects and research papers are also vital components of academic evaluation. These assignments encourage deeper exploration of specific topics and allow students to demonstrate their analytical skills, creativity, and ability to conduct independent research. Projects may involve collaborative efforts, promoting teamwork and pay for assignment writing. At the same time, research papers typically assess a student’s ability to formulate arguments, engage with existing scholarship, and present findings in a structured format.